Introduction
The NVIDIA Jetson Nano is an Internet of Things (IoT) solution to address your problems for IoT or general purposes. You can attach a camera to the NVIDIA Jetson Nano board. You can build programs such as computer vision or intelligence vision. By applying machine learning libraries on the NVIDIA Jetson Nano, you can make a smart device.
Camera Interfaces and Modules
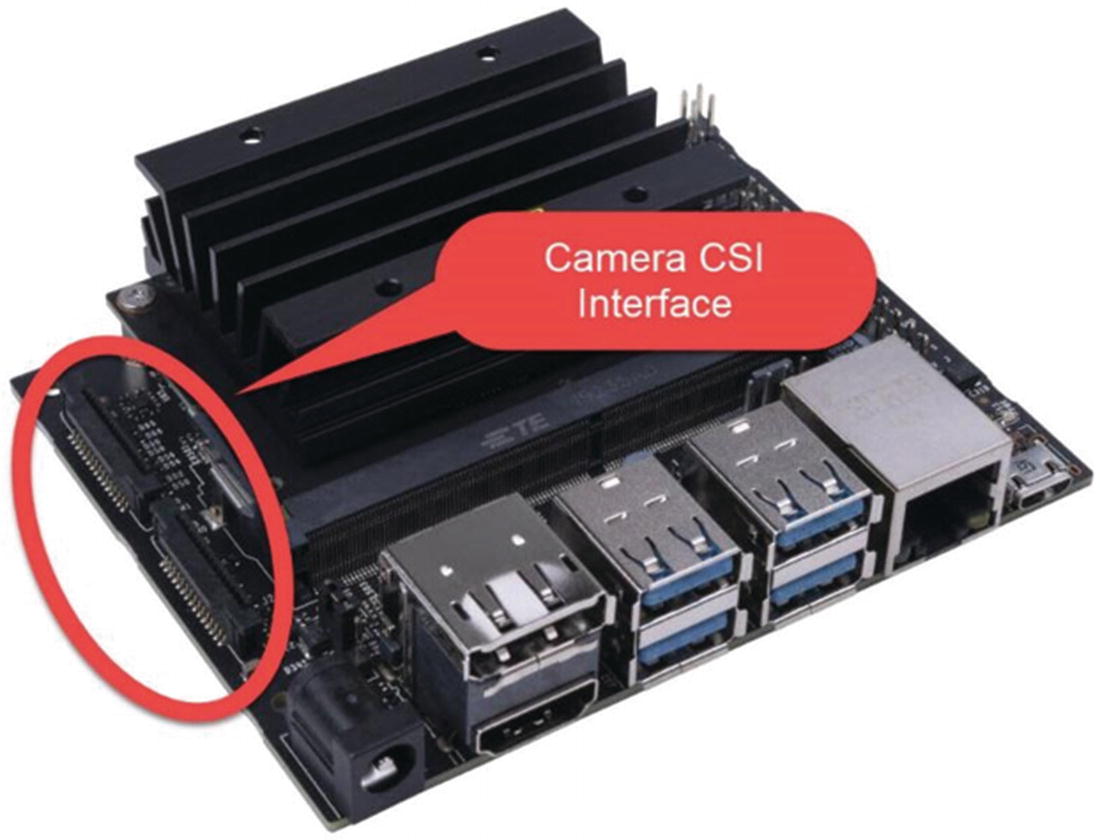
Technically, you can attach the camera module over the CSI interface or via USB. If you have the NVIDIA Jetson Nano A02 model, you will have one camera CSI interface. For the NVIDIA Jetson Nano B01 model, you will have two camera CSI interfaces. Figure 6-1 shows the camera CSI interface.

Set Up Camera Module
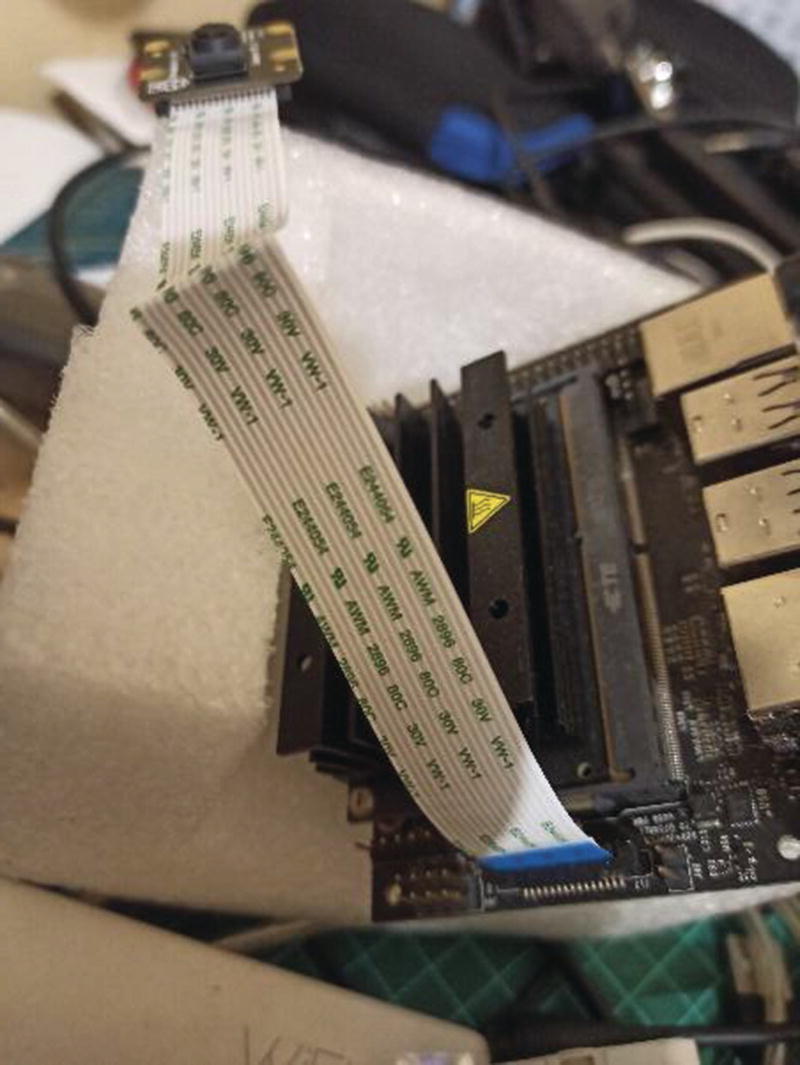
To set up the camera, just attach it to the camera interface on the board. For instance, if you have a camera CSI, you can put it on the CSI interface on the NVIDIA Jetson Nano. You can see my camera CSI Otherwise, you can use a USB camera and attach it to the USB interface of the NVIDIA Jetson Nano.

After attaching the camera to the NVIDIA Jetson Nano, verify it using this command:$ ls /dev/video*
Once you have attached your camera module, test it. For camera CSI, you can use the nvarguscamerasrc command. You can learn how to use the camera CSI with the nvarguscamerasrc command at https://github.com/JetsonHacksNano/CSI-Camera.
© Agus Kurniawan 2021A. KurniawanIoT Projects with NVIDIA Jetson Nanohttps://doi.org/10.1007/978-1-4842-6452-2_6
6. NVIDIA Jetson Nano Camera
Agus Kurniawan1 (1)Faculty of Computer Science, Universitas Indonesia, Depok, Indonesia
We can use a camera with the NVIDIA Jetson Nano board. Then, we can make a smart device-based NVIDIA Jetson Nano. In this chapter, we will explore how to access a camera module from the NVIDIA Jetson Nano board and how to attach that camera module. Then, we will install the OpenCV library on the NVIDIA Jetson Nano. Finally, we will develop programs to take pictures and record video.You will learn about the following topics in this chapter:
- Setting up a camera module
- Testing the camera
- Installing the OpenCV library
- Show video streaming from camera
- Taking a picture with the camera
- Recording video
Make sure you have a USB camera or/and camera CSI to implement all demos in this chapter.
Introduction
The NVIDIA Jetson Nano is an Internet of Things (IoT) solution to address your problems for IoT or general purposes. You can attach a camera to the NVIDIA Jetson Nano board. You can build programs such as computer vision or intelligence vision. By applying machine learning libraries on the NVIDIA Jetson Nano, you can make a smart device.
In this chapter, we will explore how to work with a camera on the NVIDIA Jetson Nano board. You can then create Python programs to access the camera from the NVIDIA Jetson Nano.
Camera Interfaces and Modules
Technically, you can attach the camera module over the CSI interface or via USB. If you have the NVIDIA Jetson Nano A02 model, you will have one camera CSI interface. For the NVIDIA Jetson Nano B01 model, you will have two camera CSI interfaces. Figure 6-1 shows the camera CSI interface.

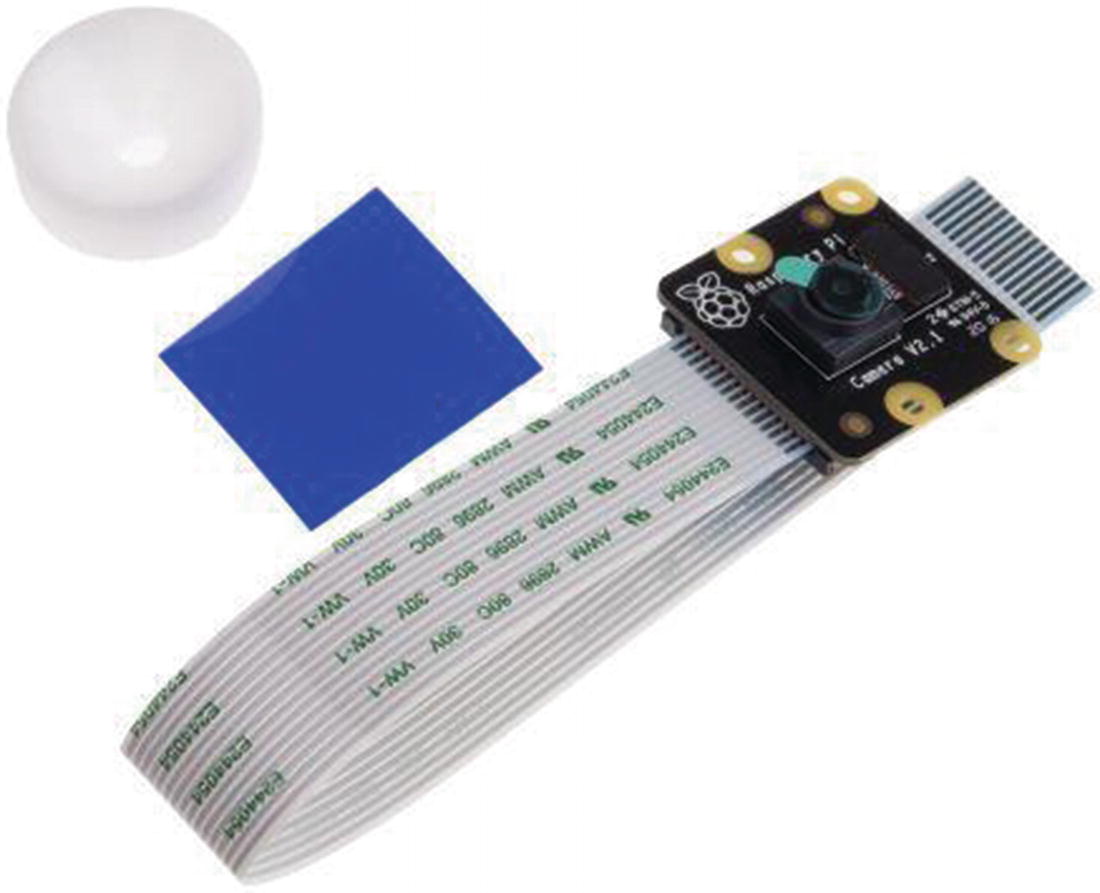
You can get a camera CSI module at your local or online electronic store. You also can use the Raspberry Pi Camera v2. You can buy this module at https://www.raspberrypi.org/products/camera-module-v2/. There is also the Raspberry Pi NoIR camera, which you can see in Figure 6-2.

You can also use a USB camera, such as a webcam. The NVIDIA Jetson Nano has four USB interfaces, so you can attach a USB camera to one of the board USB interfaces.
Set Up Camera Module
To set up the camera, just attach it to the camera interface on the board. For instance, if you have a camera CSI, you can put it on the CSI interface on the NVIDIA Jetson Nano. You can see my camera CSI in Figure 6-3. Otherwise, you can use a USB camera and attach it to the USB interface of the NVIDIA Jetson Nano.

After attaching the camera to the NVIDIA Jetson Nano, verify it using this command:$ ls /dev/video*You should see your attached camera. For instance, I attached camera CSI and USB camera devices so you can see my program output in Figure 6-4.

Once you have attached your camera module, test it. For camera CSI, you can use the nvarguscamerasrc command. You can learn how to use the camera CSI with the nvarguscamerasrc command at https://github.com/JetsonHacksNano/CSI-Camera.First, specify which camera CSI will be used. For the NVIDIA Jetson Nano A02 model, only use 0 for single camera, but if you have the NVIDIA Jetson Nano B01 model, you can select camera 0 or 1. For instance, if you attach a camera CSI to CSI interface 0, you can type this command:$ nvarguscamerasrc sensor_id=0Then, you can show the camera using nvarguscamerasrc. You can type this command:$ gst-launch-1.0 nvarguscamerasrc sensor_id=0 ! \ ‘video/x-raw(memory:NVMM),width=3280, height=2464, framerate=21/1, format=NV12’ ! \ nvvidconv flip-method=0 ! ‘video/x-raw,width=960, height=720’ ! \ nvvidconv ! nvegltransform ! nveglglessink -e
